Can Years Of Grease Inside An Oven Really Increase Your Electricity Bills?

You’ll have seen the claim. Half the oven cleaning firms in London have it on their website – a dirty oven works harder, burns more electricity, costs you money, so book a clean and save. It’s the pitch of the moment, and it’s been the pitch since the first energy crisis put the idea in everyone’s head.

I clean ovens for a living and I’m going to talk you out of it.

Does grease actually make an oven use more electricity?

A bit. The physics is sound as far as it goes, so let’s be fair to it before I take it apart.

Baked-on fat is a poor conductor of heat. Layer it over an element and you’ve insulated the thing that’s meant to be warming your kitchen’s most expensive box of air – heat has to travel through the deposit before it reaches anything, so the oven takes fractionally longer to come up to temperature and the element runs a little more often to hold it there. Grease in the vent slows the airflow, which changes how the interior holds heat. A hardened seal lets a wisp of warmth escape. All real, all measurable with the right kit.

Then you do the sum and the whole argument falls over.

What it looks like when you work it through

Run the numbers on a household that roasts on a Sunday and bakes the odd tray of something midweek. Your oven’s element is a couple of kilowatts, but it doesn’t draw that continuously – it cycles on and off to hold temperature, so an hour of roasting is nothing like an hour at full tilt. Add up a year of that and the oven is a modest line on your bill. Modest to the point of trivial next to the kettle, the washing machine, or the immersion heater somebody left on in 1997.

Now take a few percent off a small number. Near enough nothing. The difference between a filthy oven and a spotless one, across a whole year of ordinary cooking, wouldn’t cover a takeaway. It might not cover the coffee you drank while reading the website that promised you savings.

Why is the temperature sensor the one place it truly matters?

Because this is where the mechanism stops being trivial and starts being real, and it’s the one part of the story nobody selling you an energy saving has bothered to learn.

Your oven doesn’t know how hot it is. It has a sensor – on most fan ovens a thin metal probe poking into the interior, usually up in a back corner, sometimes a flat plate on the rear wall – and everything the appliance does depends on what that probe reports. Set it to 200 and the control board watches the probe, cuts the element when it reads 200, brings it back when the reading drops. The probe is the oven’s only sense organ.

Coat that probe in a few years of baked fat and you’ve wrapped it in a blanket.

An insulated sensor lags. The oven climbs to temperature and the probe, buried under its coat, hasn’t caught up – it’s still reporting cold air that stopped being cold two minutes ago. So the board keeps the element on. The oven overshoots its set point, sometimes by a considerable margin, and then the probe finally catches up and the element cuts and it swings the other way. You get an oven that runs hot, runs wide, and holds nothing steadily. That’s the appliance burning electricity it didn’t need to burn, and it’s the only version of this claim that stands up.

It also ruins your cooking, which people notice long before they notice a bill. An oven that overshoots by twenty degrees turns a cake into a brick and dries a chicken out while you swear at a thermostat that’s working exactly as designed on the bad information it’s being given.

There’s a wrinkle that makes it harder to spot. A lagging probe doesn’t fail – it just gets slow, a little more each year, and the drift is gentle enough that you adapt without noticing. You start knocking ten degrees off. Then fifteen. You learn that your oven “runs hot” and you tell guests so, and it becomes a fact about the appliance rather than a symptom of anything, and by then it’s been years since the number on the dial meant a thing. Nobody rings a cleaner about that, because it doesn’t present as dirt. It presents as personality.

Where the probe sits makes it worse again. It’s usually tucked high in a rear corner, in the exact spot the fan drives greasy air past hardest, and it’s small enough that people’s eyes slide over it. I’ve watched customers clean an oven properly, walls and roof and shelves, and leave a fat-jacketed sensor two inches from their hand because it never registered as part of the oven at all.

The probe that reads cold

I did a house on Slades Hill in Enfield where the owner had been fighting her oven for three years. Everything came out overcooked at the stated temperature, so she’d taken to setting it twenty degrees low and guessing – a workaround she’d been running so long she’d forgotten it was a workaround. Two engineers had tested the thermostat and passed it, near enough because they tested the component rather than the situation. The probe had a hard brown jacket of fat on it, maybe two millimetres thick. Cleaned it off in ten minutes with a solvent and a cloth. She rang me a fortnight later to say she’d started using the numbers on the dial again for the first time since she’d moved in.

That’s a real fault caused by grease. It cost her three years of ruined roasts. What it cost her in electricity, over those same three years, would have been swallowed by the standing charge without anyone noticing.

Doesn’t a filthy oven absorb heat better than a clean one?

The awkward bit for my own trade: yes, sometimes.

Heat moves round an oven by radiation as well as by hot air, and dark, matt surfaces are better at absorbing and re-radiating radiant heat than bright, reflective ones. That’s basic physics and it’s why roasting tins are dark and why the inside of a pizza oven isn’t polished chrome. An oven interior coated in carbon is, in strict radiative terms, doing a marginally better job of moving heat around than a factory-fresh one.

Nobody in my line will tell you that. It’s true anyway.

Where the emissivity argument runs out

The effect is small, and it doesn’t rescue a dirty oven, because carbon on the walls is one thing and fat on the sensor is another entirely. The point of raising it is to show how thin the energy story is. If a mucky cavity can plausibly cut both ways, you’re not looking at a mechanism worth anyone’s money. You’re looking at a talking point that got repeated until it hardened into a fact.

I’ve had a customer quote the energy line back to me while I was standing in her kitchen with my kit in my hand, having found it on the website of a firm she didn’t hire. She wanted to know how much she’d save. I told her the truth and cleaned the oven anyway, and she booked me again the following year, so the honesty didn’t cost what the trade thinks it costs.

So why does my trade keep saying it?

Because it works, and because it’s very hard to check.

An oven clean is a discretionary spend. It competes with a night out and a new pair of boots, and nobody’s ever been made to feel guilty about a night out. So the trade reaches for the one frame that turns a luxury into a saving – spend now, save later – and the beauty of it, from a marketing point of view, is that no customer will ever measure the outcome. Nobody’s metering their oven. Nobody’s comparing this January’s bill to last January’s and controlling for the weather. The claim can’t be disproved in a kitchen, so it goes on the website and stays there.

I think it’s dishonest, and I think saying so costs me nothing, because the honest reasons to clean an oven are much better than the fake one. Food that tastes of what it is rather than of everything cooked before it. A deposit you get back. Not filling your kitchen with smoke every Sunday. A sensor that tells your oven the truth. Those are worth money. The bill isn’t, and pretending otherwise insults the person paying.

The claim nobody can check

There’s a version of this that shades into something worse than sales patter. A few outfits put a percentage on it – clean your oven and cut its running cost by such-and-such – and I’ve never once seen one show a source or a test that would support the figure. It gets invented, then borrowed by the next website, then borrowed again, and by the third borrowing it’s wearing the clothes of a statistic. Ask the firm quoting it where the number came from and watch what happens. I’ve asked. Nobody’s ever answered.

What actually costs you money in an oven, then?

The way you use it, near enough entirely, and none of it involves a cleaner.

Preheating is the big one, and almost everyone preheats too long. A fan oven is at temperature in a fraction of the time people give it, and the extra ten minutes you spend waiting for a beep that already happened is dead money. Batch your cooking – the oven’s already hot, so a second tray costs you a fraction of what the first one did. Stop opening the door to look, because a fan oven dumps most of its hot air in seconds and then has to make it all again. Use the small oven, or the grill compartment, or a countertop machine for a jacket potato instead of heating a closed space the size of a suitcase for one spud.

That last one is the only real saving on this page, and I’d guess it dwarfs every clean I’ve ever done.

The oven you’re heating for no reason

Size is the thing nobody thinks about. Heating a big empty box takes energy in proportion to the box, and a double oven run half-empty out of habit is the single most wasteful thing in most London kitchens. A flat off Cowley Road in Uxbridge sticks in my mind – lovely big range, two enormous cavities, and a couple who cooked for two people every night of the week and had never once used the smaller side.
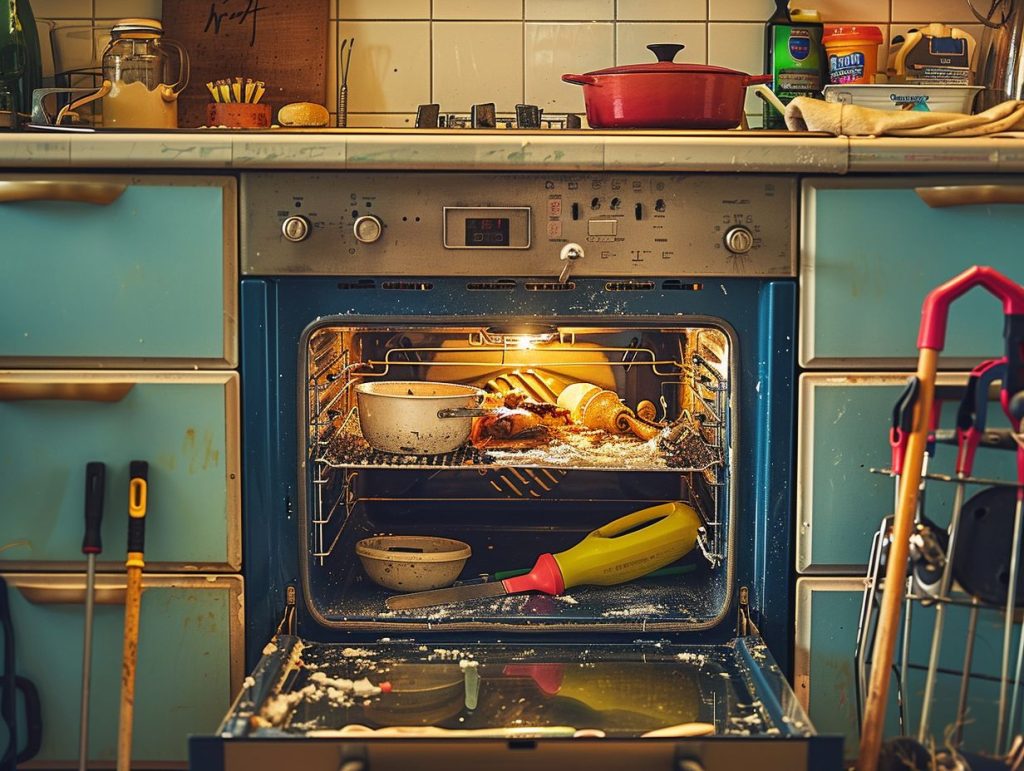

Why Premium Ovens Need A Different Approach If You Want Them To Last For Years

Somebody spends eight thousand pounds on a range cooker and then attacks it with the same yellow spray they used on the Zanussi in their old flat. I see it constantly, and it’s the fastest way I know to make an expensive appliance look cheap.

Premium ovens are built out of different materials to mid-range ones, and those materials want different handling. Not gentler handling, particularly – just handling that matches what they’re made of. Get it wrong and the damage shows up on the parts you paid the premium for.

What actually makes a premium oven different to clean?

Materials, mostly, and the amount of them that isn’t enamel. A mid-range oven is a steel box with a hard vitreous enamel cavity and a plastic fascia, and there’s very little on it you can hurt. Move up the range and you start collecting surfaces with opinions – brushed stainless with a grain direction, anti-fingerprint coatings, anodised aluminium trim, brass, and on the serious range cookers a fair amount of cast iron.

Every one of those wants something different. That’s the whole difficulty.

Brushed stainless is the one people ruin first, and it happens quietly. The finish is a directional grain, fine parallel lines running one way across the panel, and it looks right because light travels along those lines consistently. Scrub across the grain with a pad and you cut a haze of tiny scratches at right angles to it. The panel goes cloudy in patches under the kitchen lights, and there’s no undoing it short of refinishing the sheet. In my book that’s the single most common premium-oven injury in London, and it’s inflicted with the best of intentions by people trying to be helpful.

The grain you have to follow

Stand square to the panel and find the direction of the lines before you touch it. On most oven doors the grain runs horizontally, side to side, though I’ve met plenty that run vertically and a few where the fascia and the door disagree with each other. Wipe with the lines. Never in circles – circular polishing is what puts that dull swirl into a steel door that catches your eye every time you walk past and can’t be buffed out.

Anti-fingerprint coatings complicate it further. They’re a thin clear layer over the steel, and a lot of steel polishes are mildly abrasive, so a product sold to make stainless shine will strip the coating off in uneven patches. Then you get an appliance that marks worse than a bare one would have.

Are the manufacturer’s own cleaning products worth the money?

Mostly a racket, and I’ll say so as someone who buys them. A bottle of branded oven conditioner is four or five times the price of an equivalent from a janitorial supplier, and the contents are rarely doing anything exotic.

The exception is the ones for coated surfaces, and it’s a real exception. If your fascia is anti-fingerprint coated, the branded product for that appliance is formulated to leave the coating alone, and the twelve quid buys you certainty rather than chemistry. Everything else in the branded range – the cavity cleaner, the descaler, the steel polish – has an unbranded equivalent that performs identically for a fraction of it.

What the branded bottle does buy, and I’d rather be straight about this, is a warranty argument you can’t lose. If a coated fascia goes patchy inside the guarantee period and you’ve used the maker’s own product on it, that’s their problem. Use a supermarket steel polish on it and the conversation goes differently. So the premium isn’t for the liquid. It’s for the receipt, in the years when the receipt matters.

What to reach for on cast iron

Range cookers change the rules again. The pan supports and often the hotplate are cast iron with a matt enamel or a bare seasoned surface, and cast iron hates two things: soaking and detergent. Leave a cast iron pan support in a sink of hot water overnight – which is precisely what a well-meaning cleaner does – and it comes out with an orange bloom of surface rust by morning. Strip the seasoning off a bare cast iron plate with washing-up liquid and you’ll be starting the seasoning again from scratch, which takes weeks of cooking to build back.

Scrape it hot and wipe it, then oil it lightly while the warmth is still in it. That’s the whole method, and it’s older than any of the appliances it applies to.

Do the moving parts need more attention than the surfaces?

More, and they get almost none. This is where premium ovens differ most from cheap ones and where nobody thinks to look.

Telescopic runners are the obvious case. A good oven has full-extension shelf rails on ball-bearing slides so the shelf glides out under the weight of a turkey without tipping. Those bearings run in a track, and that track is inside the oven, at 200°C, in an atmosphere of fat vapour. Grease gets into the bearings and cooks. The slide goes from smooth to gritty over a couple of years, then it sticks, then somebody yanks it and bends the rail.

I did a big French range on Foxley Lane in Purley where the owner had been told by two people that her runners were “just worn out” and needed replacing at a frankly obscene price per rail. They weren’t worn. They were full of carbonised fat. Two hours of soaking and working solvent through the bearings with a syringe and they ran like new, and I felt slightly guilty charging for it. She’d been half an hour from ordering four hundred quid’s worth of parts she didn’t need.

Hinges, springs and the door that stops closing right

Oven doors on the better appliances are heavy – triple-glazed, sometimes cast frames – and they hang on sprung hinges designed to hold the door at any angle and pull it shut over the last inch. Grease works into the hinge mechanism from the cavity side and stiffens the spring. First the door stops self-closing over that last inch. Then it sits fractionally proud at the top, which lets heat and grease escape onto the fascia, which stiffens things further. In my book a door that no longer pulls itself shut is the earliest honest warning a premium oven gives you, and everyone ignores it for about eighteen months.

Does a premium oven actually last longer than a cheap one?

No. And the showroom conflates two different things on purpose, so they want separating.

A premium oven is more repairable than a cheap one. Parts stay available for a decade or more, the construction comes apart with a screwdriver rather than snapped plastic clips, and an engineer can replace a fan motor or an element without writing the appliance off. A budget oven fails at seven years and goes in a skip because the part costs more than the machine.

That’s repairability. It isn’t durability, and the two get sold as one word.

The failure points on an expensive oven are, if anything, worse. There’s more electronics in it – touch controls, a display board, temperature probes, sometimes a Wi-Fi module nobody asked for – and electronics in a hot, greasy, humid box behind a fascia are exactly as fragile as they sound. I’ve condemned more premium ovens for dead control boards than for anything mechanical. The chassis will outlive all of us. The brain won’t.

So the longevity you were sold isn’t inherent to the thing. It’s conditional on somebody maintaining it, and the maintaining is the bit that never got mentioned while the deposit was being taken.

Why pyrolytic cycles are harder on the good ovens

This next bit gets me disliked. A pyrolytic cycle at 500°C for three hours cooks everything inside that cabinet, and the control board is inside that cabinet. Manufacturers insulate for it and fit thermal cut-outs and it’s all within spec, and I still think running a pyro cycle weekly on a premium oven shortens its electronic life by years. Every board I’ve pulled out of a heavily pyro’d appliance has been browner and more brittle than the same board from an oven that got cleaned by hand. That’s my observation over two decades, not a lab result, and the manufacturers would tell you I’m wrong.

Run it monthly if you like. Weekly is you paying to bake your own control board.

When does cleaning turn into maintenance?

At the point you stop cleaning what shows and start touching what moves. The two jobs look nothing alike.

Cleaning is the fascia, the cavity and the shelves. Maintenance is the runners freed off, the hinge mechanism cleared, the seal checked for hardening, the probe socket unblocked so the meat probe still reads true. In my book any oven over about four grand wants that second list once a year, and almost none of them get it, because the owner is looking at a machine that appears immaculate and can’t see a reason to spend money on it.

The annual list nobody was given

Nobody hands you this when the appliance goes in, so here it is in plain terms. Free the runners and re-work the bearings. Clear the hinge channels. Press the door seal between finger and thumb and see whether it still gives – a hard, shiny gasket has stopped sealing whatever it looks like. Check the probe socket for baked fat, because a blocked one reads cold and ruins a joint of beef while telling you it’s fine. Look at the enamel for crazing, that fine web of hairline cracks that comes from thermal shock, usually from someone throwing cold water into a hot cavity to speed a clean along.

None of it takes long. All of it wants doing before the symptom arrives rather than after, which is the opposite of how anyone treats an appliance that still looks new.

A mansion flat off Doughty Street in Bloomsbury, last autumn: a twelve-year-old German oven, spotless, and I had to break the news that the reason her shelves crashed out onto her feet was that nobody had ever cleaned inside the rails.

Why A Fan Oven Starts Smoking Even When It Looks Perfectly Clean

You wipe the oven out on Saturday. Sunday afternoon you put the chicken in, the fan spins up, and by the time it hits 180 there’s a thin blue haze creeping out round the door and the smoke alarm in the hall is thinking about it.

Nothing you can see is dirty. That’s the whole problem – smoke doesn’t come from the surfaces you look at. It comes from the ones you don’t, and after twenty-odd years of pulling fan ovens apart in London kitchens I’d put money on where yours is coming from before I’ve taken my coat off.

Where is the smoke coming from if the cavity is spotless?

Smoke means grease above its smoke point, somewhere in that box, getting hotter than it wants to be. Beef dripping gives up around 205°C. Butter starts complaining at 150. Your oven runs at 180 to 220 for a roast, so any fat sitting on a surface at that heat will smoke, and it doesn’t care whether you can see it.

The five walls you wipe are the coolest, cleanest part of a fan oven. Everything that smokes lives somewhere else.

The element is the first suspect and the one people never consider. In a fan oven the heating element is a circular ring behind the rear panel, wrapped round the fan, and it runs far hotter than the air in the cavity – hot enough to take fat well past its smoke point in seconds. A spot of grease on that ring smokes every single time the oven comes on, and you could scrub the cavity daily for a year without touching it.

The fat that lives where the cloth can’t

Under the base plate, too. Most fan ovens have a removable floor panel with a gap underneath it, and drips find their way down there through the vents and the edges. Nobody lifts it. Fat sits in that void, cooks a little more each time, and eventually starts smoking off a surface the owner doesn’t know exists. I lift base plates on nearly every job and there’s a fair chance of finding a year’s worth of Sunday underneath.

Grease is a liquid at oven temperature. It runs, it gets into gaps, it finds the low points and the shadows. Then it cools and sets and waits for you.

The vent is worth a mention while we’re here. Fan ovens exhaust through a duct, usually up behind the control panel or out through a slot above the door, and that duct carries every bit of fatty air the cavity produces. It furs up over the years like a flue. Grease in a vent doesn’t smoke much on its own – it’s cooler up there – but it narrows the passage, so the cavity holds onto more of its own smoke instead of clearing it, and a haze that would once have vanished now rolls out at you when you open the door.

Why does a fan oven smoke worse than a conventional one?

Because the fan turns fat into weather. A conventional oven heats by radiation and convection – the air moves lazily, fat mostly stays where it lands. A fan oven pushes air round the cavity at a good clip, and that moving air picks up vaporised fat and carries it everywhere the airflow goes. Behind the back panel. Into the vents. Up onto the roof and along the door frame.

So the mess in a fan oven is spread thin over a much bigger area than the mess in an old gas one. Thin films smoke faster than thick deposits, because there’s less mass to heat.

That’s the irony of the thing. The better your oven circulates air, the more comprehensively it distributes its own grease, and the more places it can smoke from later.

Why the fan makes a thin film worse than a thick crust

A blackened crust in the corner of the base is carbon, and carbon has already given up most of what it had to give – it’s ugly and it stains, and it smokes far less than people assume. The faint tan film the fan lays down across the roof and the rear panel is still fat, still volatile, still full of what makes smoke. So the oven that looks worse often smokes less. And the tidy-looking one, wiped weekly on every surface within arm’s reach, sends a haze up every Sunday because the film the fan put behind the panel has never once been disturbed.

Is your new oven smoking, or is the old grease burning off?

New ovens smoke, and this catches people out badly. There are protective oils and manufacturing residues on the element and the cavity steel that have to burn off, and the manual tells you to run an empty cycle at 200°C for half an hour with the window open before you cook anything. Half of everyone skips that page and gets a kitchen full of acrid smoke and a first roast that tastes faintly of factory.

That kind of smoke stops. It smells chemical rather than of food, it fades over two or three uses, and it means nothing is wrong.

The burn-off nobody runs

There’s a second version of this that I get called out to more often – a new oven in a flat where the old one was replaced and the installer didn’t clean the housing. The cabinet the oven slides into carries years of grease on its floor and sides, and the new appliance sits in the middle of it and heats it all up. Owner rings the manufacturer, insists the new oven is faulty, and it’s a spotless appliance getting warm inside a filthy hole. I’d put money on that being the answer any time someone tells me their brand-new oven smokes and the smell is of old food rather than chemicals.

Could the smoke be something other than grease?

Frequently, and the one I meet most is cleaner residue. Somebody sprays a caustic product into the cavity, wipes it down, and doesn’t rinse it properly – and caustic soda residue left in an oven fumes when it heats, with a sharp, throat-catching sting that’s nothing like food smoke. It’ll do that for several cycles until it’s finally cooked away. Anyone who’s had it will tell you it’s worse than the grease was.

The rinse is the step everyone shortcuts, and I understand why – you’ve done the hard part, the oven looks fixed, and going back over every surface with clean water and a fresh cloth three or four times feels like penance for a job already finished. Skip it and you’ll taste it. Caustic residue transfers to food, and a roast potato that’s picked up a whiff of oven cleaner is a memorable thing in the worst way.

Then there’s plastic. Bits of packaging, the odd freezer bag, a plastic clip off a chicken – they melt onto the base or drop through into the void underneath and smoke for months afterwards. Melted plastic on the base plate is the one that gets misdiagnosed as an electrical fault more than anything else, because it smells wrong and it smells serious.

The bag clip that cost two call-outs

I did a flat on Amwell Street in Clerkenwell where the owner was convinced her oven was on the verge of catching fire – smoke every use, terrible smell, two engineers had been out and shrugged. It was a plastic bread bag clip. Welded onto the underside of the base plate, where it must have slipped through a vent a year before, quietly melting a bit more every time the oven ran. Fifteen minutes with a scraper and it never smoked again. Both engineers had checked the wiring and neither had lifted the floor.

Sugar does something similar, for what it’s worth. A spill of syrup or a fruit filling that boils over caramelises, then carbonises, and burnt sugar smokes at a lower temperature than fat does and smells sweeter and sharper. People chase it round the cavity walls while it sits in the drip channel at the bottom of the door, out of the light.

When does smoke actually mean a fault?

Almost never, and I’ll say the unpopular thing plainly: stop calling an engineer about a smoking oven. You’ll pay a call-out fee for a man to stand in your kitchen, sniff, and tell you it’s dirty – and I’ve watched that happen enough times to think the trade knows full well and takes the money anyway. Smoke is a cleaning problem in the overwhelming majority of cases, and the exception isn’t subtle.

What a genuine fault smokes like

A failing element gives itself away. It blisters or splits, you’ll see a bright spot or a bulge on the ring when you look at it cold, and the smoke comes with a burnt-electrical smell and often a tripped breaker. A dead thermostat runs the oven far above its set point, and then everything smokes because the whole cavity is hotter than it should be – you’d notice your food incinerating long before you noticed the haze. Both of those are obvious. Neither of them presents as “my clean oven smells a bit on a Sunday.”

If the smoke smells of food, it’s food. That’s the entire diagnosis, and it costs nothing.

The one caveat I’d add is the extractor above the hob, which people forget is part of the same problem. A saturated grease filter and a smoke-filled kitchen go together, and if your hood hasn’t had its filters through the dishwasher in a year then some of what you’re breathing on a Sunday never came out of the oven at all. It came out of the ceiling.

I’d put money on this being the shortest useful test in the trade: run the empty oven at 200 for twenty minutes and stand there with your nose near the vent. Chemical means residue or a new appliance. Burnt toast and roast dinners means fat, somewhere behind a panel, and it means someone’s taking that panel off.

Pulled a fan out in Herne Hill last week that was so caked the blades had gone from silver to the colour of gravy, and the cavity it sat behind was spotless enough to eat off.

The Oven Details London Inventory Clerks Notice Before They Check The Rest Of The Kitchen

An inventory clerk gets maybe twenty minutes to walk a whole flat at check-out. A fair chunk of that goes on the kitchen, and a surprising slice of the kitchen time lands on one appliance. The oven tells a clerk how the tenancy was kept, and every one of them knows it.

I clean ovens for tenants and landlords across London, and I’ve stood behind enough clerks on check-out day to know where their eyes go first. It’s rarely where the tenant spent their Sunday. They open the door, they look up, they run a finger along the seal – and the deductions are half-written before the hob has had a glance.

What do clerks look at before they even bend down?

The door, at eye level, before a knee touches the floor. A clerk clocks the glass first because it’s the one part of the oven on show without opening anything, and a smeared, greasy door tells the story before they’ve read a line of it. Then the controls – the fascia and the knobs, with those worn patches where someone’s degreaser has stripped the printed numbers clean off the dial.

None of that is the cavity. All of it lands on the report.

There’s the outside of the oven, too, and the gap it sits in. Grease runs down the front and pools where the appliance meets the units either side, and a good clerk pulls the oven forward a few inches if the housing lets them. The strip of worktop and cabinet the oven hides is a favourite spot for a deduction, because tenants never think to clean a surface they can’t see behind an appliance they can’t easily move.

Why the oven door is the first photograph on the report

Nine times out of ten the first oven photo on a check-out report is the closed door, shot from standing height. It’s the establishing frame. If the glass is hazy or there are baked runs down the trim, the clerk has formed a view already, and every open-door photo after that gets read in the same unflattering light.

The short version, for a check-out: a clean, clear door buys goodwill for everything behind it, and a filthy one costs you the benefit of the doubt on things that would otherwise have slipped through.

Clerks work fast, and first impressions do a lot of the deciding. A door that gleams sets the tone before the oven’s even open, and a clerk half-expecting to find the rest done to the same standard tends to find it. A grimy door primes them the other way, and every borderline call after that goes against you. It isn’t fair, particularly, but it’s how a tired person working through a checklist in a cold flat behaves.

Is the grill pan the item that fails more check-outs than the oven itself?

More often than you’d think. The grill pan lives down the bottom, does the bacon and the cheese on toast, and gets shoved back black. Tenants clean the main cavity and forget the pan counts as its own inspected item. Clerks never forget. It comes out, it gets turned over, and the underside – always the underside – is where the welded-on fat is hiding.

Nine times out of ten the grill pan comes back to me black underneath even when the top has had a wipe.

The handle and the rack everyone forgets

The wire rack that sits inside the grill pan, and the clip-on handle that comes with it, get logged as separate lines on a thorough report. The rack browns to a deep bronze and won’t come back to white without a long soak. The handle collects melted grease right at the joint where nobody scrubs. A tenant who’s degreased every inch of the cavity can still drop a slice of deposit over a bacon-stained rack they never thought counted for a thing.

The maddening part is how easy the pan is to rescue. An overnight soak in hot water and a strong degreaser does most of the work while you sleep. The job is neither hard nor slow. It gets forgotten, and forgotten costs a tenant the same as neglected when a clerk is filling in boxes.

How much does the top of the oven cavity matter?

A great deal, for the plain reason that almost nobody cleans it. The roof of the oven and the underside of the top element catch a fine mist of fat off everything roasted below them. You look at an oven from in front and above, so you never clap eyes on it. Clerks do. They crouch with the phone torch on, and the ceiling of the cavity is one of the first inside surfaces they light up.

The bit you can’t see standing up

Crouch at your own oven and look up into it. That brown, textured coat across the roof is months of vaporised fat, whatever you tell yourself about seasoning a pan. On a check-out it reads as neglect, flat out. A drop-down grill element hides its own top face as well, and that surface goes untouched from one tenancy to the next as a rule, because you’d have to know to reach up behind it.

The roof is also where a clean goes wrong even when someone’s tried. People spray the cavity walls, wipe what they can see, and never once tilt their head back. So the walls come up gleaming and the ceiling stays brown, and a clerk with a torch spots the mismatch in a second. A half-cleaned oven can look worse on the report than a filthy one, because it shows the tenant had a go and gave up before the awkward bits.

Do the shelves and the door seal give you away?

Both, and they’re the details that split a rushed clean from a proper one. The shelves discolour and warp a touch with heat, and the runners they ride on trap grease down in their channels where a cloth doesn’t reach. The rubber door seal – the gasket round the frame – goes hard and greasy, and in a bad case it crumbles the moment a clerk runs a finger along it.

Discoloured racks and a perished gasket

The racks are a fair-wear grey area, and this is where I’ll pick a fight. A lightly discoloured shelf is fair wear and tear, and any clerk logging that as damage is chancing it. A shelf caked in carbonised grease is dirt, plain and clear, and they’re right to write it up. Tenants lump the two together and cry foul over deductions that were fairly earned. Clean the grease off and let the honest discolouration stand on its own – that’s the shelf you can defend when the report lands on the agent’s desk.

The seal is the one people don’t even know is theirs to clean. It’s rubber, it’s tucked into a channel round the door, and it holds grease like a sponge because heat softens it and the fat sinks in. A clerk knows to check it precisely because tenants don’t. Wipe it warm, not hot, with a cloth and a little washing-up liquid, and go gently – scrub too hard on an old gasket and you’ll tear it, which turns a cleaning note into a damage note and costs you a good deal more.

Does a professional cleaning receipt actually protect your deposit?

This is the belief I run into most, and it’s wrong. Tenants treat a receipt from a cleaning firm as a shield. Show the clerk the invoice, the reasoning goes, and any oven complaint bounces straight off it. Check-out has never worked that way.

A clerk records the condition in front of them, and a receipt is no part of that record. Clean oven, it passes, whether you scrubbed it yourself at midnight or paid a firm to do it. Dirty oven, the receipt changes nothing – I’ve stood in a kitchen and watched a tenant wave an invoice while the clerk photographed grease baked onto the element and wrote it up anyway. The receipt proves you spent money. It doesn’t prove the oven is clean, and only one of those two facts goes on the report.

A tenant on Lauriston Road, over by Victoria Park, had paid a cut-price deep-clean outfit and kept the receipt like a golden ticket. She still lost part of her deposit, because the crew she’d hired had done the cavity and nothing else, the grill pan still black underneath. The receipt didn’t save her. A proper job would have, and cost her much the same.

What the receipt does buy you is a route to challenge, and that’s worth something on its own. If you’ve paid a firm and the clerk still marks the oven down, you’ve a paper trail to take back to them and, if it comes to it, to the deposit scheme’s adjudicator. The invoice is evidence in a dispute. It’s dead weight at the inspection itself. Tenants get those two roles muddled and lean on the receipt at the exact moment it can’t help them.

What a clerk records versus what you paid for

The gap between what you paid for and what got cleaned is exactly where deposits disappear. A cheap oven clean that photographs well from the front and falls apart under a clerk’s torch is worse than no clean at all, because it talks you into thinking you’re covered when you aren’t. Nine times out of ten the cut-price jobs I’m called in to re-do have skipped the same short list – the pan, the roof, the seal, the runners. If you’re paying someone, watch whether they take the door apart and pull the shelves and racks right out. Where they don’t, you’ve bought yourself a receipt and not a lot else.

I stood behind a clerk in a flat off Elgin Avenue in Maida Vale last month who spent longer on the grill pan than on the whole hob. She photographed the underside of it twice.

Why The Glass In Your Oven Door Turns Cloudy And Can It Ever Look New Again

Nobody buys an oven and gives the door glass a second thought. Then one Sunday you crouch down to check on the roast, can’t make out a thing through the murk, and wonder when the window went.

Cloudy oven glass is one of the most common jobs I’m asked about across London, and it’s the one where I most often have to hand people news they’d rather not get. Some of that cloud comes off with the right approach. Some of it has settled in for good, and hand on heart, the sooner you know which one you’ve got the less money you’ll throw at miracle sprays that were never going to work.

Why does oven door glass go cloudy in the first place?

There are a few culprits, and they behave nothing alike. The first is a film of vaporised fat that settles on the inside of the glass and bakes to a yellow-brown tint a little more with every use. The second is mineral scale, left behind by water – a steam cycle, a boil-over, condensation running down a cold pane. The third is actual damage to the surface of the glass, and that’s the one that ends the conversation.

Grease wipes. Scale dissolves. Etching stays.

If you’ve never taken anything abrasive or caustic to that door, the odds are your cloud is one of the first two, and both of those I can move.

The film that wipes away, and the frosting that won’t

The test I run on the doorstep is quick. Drag a fingernail or a plastic scraper across the haze under a strong light. If a smear lifts and the glass underneath goes clear, there’s film or scale sitting on the surface, and it’ll come off with the right chemistry. If the pane stays uniformly dull whatever you do – if it reads as frosted rather than dirty – the glass itself has been attacked. No soak and no product bring frosted glass back to clear. The glass has changed, and there’s no dirt left to remove.

That thirty-second check saves people a fortune. I wish more of them ran it before they bought their fourth bottle of something.

Worth knowing which side the trouble lives on, as well. A film or a scale almost always sits on the cavity side of the inner pane, where the heat and the mess are. Fogging that appears to float in the middle of the glass, that you can’t reach from either face, means the seal between two panes has failed and moisture has crept into the gap – a different job again, and one no cleaner touches.

Could your own oven cleaner be etching the glass?

I’ll say the thing most people don’t want to hear. The majority of permanently cloudy oven doors I get called to have been ruined by the owner, using a product they bought to help.

Caustic oven cleaners – the thick pastes and the fume-heavy aerosols – work because they’re loaded with sodium hydroxide, the same caustic soda that clears a blocked drain. On baked-on grease it’s superb, and I use alkaline products myself every working day. On glass it’s a slower, quieter problem. Hot, concentrated caustic soda attacks the surface of glass over time, leaching it and leaving a frosted etch that doesn’t come back off. One application won’t do it. Months of paste smeared across the inside of the door and left to dwell while you get on with your day absolutely will.

The ones who get caught out tend to be the diligent ones. They clean often, and they leave the strong stuff on that bit longer for a better result, and each go the glass gives up a little more of itself. By the time the frost shows, the damage was done a dozen cleans ago.

Read the back of most of those bottles and you’ll find a line, in the small print, telling you to keep the product off glass and certain trims. Nobody reads it. The product sits on a shelf that says “oven cleaner” and the biggest sheet of glass in the oven is the door, so on the door it goes. I don’t blame anyone for the assumption. I blame the label for burying the one warning that would have saved the pane.

What caustic paste does to a sealed surface

I stripped a double-glazed door for a chap on Tyrwhitt Road in Brockley last winter, sure there was grease trapped between his panes. Not a spot in there. Both inner faces were spotless. The haze he could see was etched into the pane that faces the cavity, years of a well-known caustic paste he swore by, and I had to tell him on his own kitchen floor that the glass was finished. Hand on heart, the honesty is the hardest part of this trade – harder than the graft by a mile.

He’d have been better off never cleaning that door than cleaning it the way he did. I don’t say that to be unkind. I say it because a bit of baked grease you can see through beats a frosted pane you can’t, every time.

There’s a wrinkle to this most people never hear about. A fair few oven doors carry a thin heat-reflective coating on one of the inner panes, there to bounce warmth back into the cavity and keep the outer glass cool enough to touch. Caustic paste strips that coating unevenly, and once it’s patchy the door looks permanently smeared no matter how clean it is. You can’t wipe off damage to a coating. It sits inside the sealed sandwich of the door, out of anyone’s reach.

Why do London ovens get that milky, hard-water haze?

London sits on hard water across most of its patch, and the further east you go, out over the chalk and gravel, the worse it gets. Every time water meets hot glass and evaporates – a steam programme, a spilt casserole, condensation on a cold morning – it drops its dissolved minerals as a thin scale. Let that stack up over a year and you get a milky, faintly rainbow sheen that people take for permanent damage.

It isn’t. This one lifts.

Descaling the glass without wrecking it

The fix is a mild acid. Reach for a stronger alkali when the acid doesn’t work in the first minute and you’ll turn a scale problem into an etching problem. A paste of white vinegar or a citric-acid solution, left to sit and then worked with a non-scratch pad, dissolves the mineral layer and hands the glass back clear. The dwell time is the part everyone rushes. Give a stubborn scale a good twenty minutes under a wet cloth so the acid can bite, then it wipes off with barely any effort at all.

I did an oven in Ealing where the door looked beyond saving and came up like new after two twenty-minute soaks. The owner had been ready to buy a whole new appliance over a fault that was, at bottom, kettle fur on glass.

Can scratched or pitted glass ever be polished back?

Sometimes, and only within limits. If the cloudiness is a web of fine scratches – the handiwork of a green scourer or a metal scraper dragged dry – a glass-polishing compound like cerium oxide can reduce it, buffed in with a felt pad and a great deal of patience. You’re grinding the surface flat again at a microscopic level, and it wants a slurry and a very steady hand.

Deep pitting or a full caustic etch is past all that. Cerium oxide takes out scratches you can catch with a fingernail. It does nothing for glass that’s been chemically eaten, because there’s no raised scratch left to polish – only a softened, duller surface across the whole pane.

Where cerium oxide helps and where it doesn’t

On light scouring marks, a couple of hours with cerium oxide can carry a door from hazy to clear enough that you’d never know anything happened to it. On a caustic frost, you’ll spend those same two hours and change nothing but your faith in the product. I keep a tub in the van and reach for it maybe one job in ten. Most cloudy glass I meet has already gone past the point where it can do anything, and there’s no product on a shelf, whatever the label promises, that reverses a chemical burn on glass.

So is it worth restoring, or cheaper to replace the door?

That depends on what you’re dealing with, and I’ll give you my rule of thumb straight. Film or scale – don’t spend a penny on replacement, because a proper clean sorts it whether you do the work or I do. Etched or deeply scratched – restoration is often a false economy, hours poured into a middling result when a fresh pane would have you sorted by teatime.

The one thing I’d steer you away from is the internet’s favourite trick of coating the etched glass in oil or a wax polish to fill the frosting and fake a clear finish. It works for about a day, until the first hot cycle burns it off and you’re back where you started, now with a faint smell of scorched polish for good measure.

When a new inner pane beats hours of graft

Most oven doors come apart. The inner pane is usually a separate sheet held in by the door frame, and for a lot of makes you can order that single piece as a spare part for far less than a whole door costs. The job is fiddly rather than skilled on most models – free the frame screws, swap the glass, put it back together. Hand on heart, I’ve talked more than one customer through ordering their own pane rather than take their money to restore something that was never coming back.

The chap in Brockley ordered his in the end. An afternoon’s work and a fraction of a call-out, and his roast has been visible ever since.

The Truth About Self-cleaning Ovens: What Pyrolytic, Catalytic And Steam Functions Still Cannot Do

Every kitchen showroom in Greater London sells the same promise: buy the oven with the clever cycle and you’ll never scrub again. I’ve cleaned ovens across the capital long enough to watch that promise curdle in a good few thousand kitchens.

Pyrolytic, catalytic, steam. Different ideas, same marketing line. None of them cleans an oven the way the brochure implies, and after twenty-odd years of stripping these things down to their hinges I’d rather tell you where they stop than let a salesperson tell you they don’t.

What does a pyrolytic cycle actually burn off?

A pyrolytic oven heats its own cavity to around 500°C and holds it there for anywhere between ninety minutes and three hours. Grease and dropped food don’t stand a chance at that heat – they turn to a fine grey ash. You open the door once it’s cooled, wipe the powder away with a damp cloth, and the inside looks close to showroom condition. On paper it’s the most effective cleaning technology in any kitchen.

The five steel walls of the cavity do come up beautifully. I won’t pretend otherwise. I’ve watched ovens that hadn’t been touched in a year come out of a pyro cycle looking a decade younger, and there’s a reason people pay the extra few hundred quid for the function when they’re standing in the showroom.

An oven is more than a box, though.

The cycle cleans the space the heat fills, and it ignores everything outside that space. The control panel and the outer trim stay exactly as they were. The extractor hood above the hob keeps gathering the same grease vapour the oven throws off, week after week, and no self-clean setting will ever reach up there. And then there’s the door glass, which is where most of the disappointment lives.

Why the door glass is the part it never touches

Most pyrolytic doors are built from anywhere between two and four separate panes with air gaps sealed between them. The innermost pane catches a share of the cavity heat. The gaps between the panes catch nothing at all. Grease vapour finds its way into those gaps across the years and bakes onto the inner faces as a brown haze – you can see it through the glass, and you cannot get near it.

No cycle reaches that film. I take doors off their hinges and split them down to the individual panes to clean it out, and the look on a customer’s face when I explain that their self-cleaning oven needs a grown adult to dismantle the door by hand – that one never gets old.

The clue is usually the crumb trap along the bottom of the glass, too. On a lot of models there’s a slim recess at the base of the door where crumbs and fat collect, sealed away from the cavity, and it turns into a black tar over time. People assume the cycle cooks it off. It never gets warm enough down there.

Are catalytic liners worth the money?

I’ll be blunt, because this is the part of the showroom pitch that irritates me most. Catalytic liners are the weakest self-cleaning idea sold in Britain, and most people who pay extra for them are buying a consumable that’s been dressed up as a permanent fitting.

The mechanism is straightforward. The rear and side walls carry a rough, porous enamel coated with a catalyst. As you cook at 200°C and above, that coating oxidises fat splashes and breaks them down as you go – no special cycle, it just happens while your roast does. On paper it’s clever. Clever chemistry, even.

The problem is capacity.

A catalytic coating can only absorb and oxidise so much fat before it saturates. Full. Done. And once a liner reaches that point you cannot clean it, because scrubbing the surface or hitting it with any oven cleaner strips the porous coating and destroys whatever catalytic action was left in it. The only remedy the manufacturer offers is a fresh set of liners.

I got called out to a house on Dartmouth Park Hill, up in NW5, to a couple with a big German range about five years old. They were certain it was faulty – every roast came out smelling faintly of old fat, and they’d decided the fan motor was on its way out. Nothing was faulty. The catalytic panels had saturated somewhere around year three, and they’d been gently warming rancid grease ever since, because a saturated liner keeps collecting fat and stops processing it. I couldn’t clean those panels without finishing off what little function remained. The honest answer was replacement, and the maker had long since discontinued that liner set. They had paid a premium at the point of sale for a feature that wore out well inside the working life of the oven.

That’s the catalytic con in a single kitchen.

The moment a liner stops absorbing

You can spot a dead liner without any special kit. A working catalytic surface stays matt and dry-looking. A saturated one develops a faint sheen, sometimes shiny brown patches where fat is sitting on top of the coating instead of sinking into it, and it gives off that acrid, reheated-grease smell every time the oven comes up to temperature. Once the sheen appears, the chemistry is finished. Buy a bottle of cleaner at that stage and you’ll only speed the liner’s death along.

Can a steam function replace a proper degrease?

Steam cleaning is the gentlest of the three and, on paper, the tidiest solution going. You pour a measured splash of water into the base or a reservoir, run a low cycle at around 90°C, and the steam softens light residue so it lifts off with a cloth.

After a lasagne that bubbled over the dish? Fine. It loosens the fresh stuff, and I’ve no quarrel with it as a weekly habit.

Carbonised grease is a different animal, and carbon is what spoils how an oven looks and smells. Steam won’t shift the black, brittle deposits welded to the base plate and the element after months of roasting. It softens the top skin and leaves the crust beneath untouched. You get the pleasant illusion of a clean oven while the real problem sits there, unmoved, waiting for someone with a scraper.

Where the steam quietly gives up

There’s a London wrinkle on top of all that. Our water is hard, properly hard, and every steam cycle leaves a little more limescale in the reservoir and the channels feeding the cavity. Nobody descales an oven. Give it two or three years and the steam function pushes through less water and, eventually, a fault code – all because the last person to give limescale a thought was the plumber who fitted the boiler.

Why does the smell linger after a “clean” cycle?

The fan is the usual culprit, and no self-cleaning function on the market was built to touch it.

In a fan oven, air gets drawn across a circular element and blown back into the cavity by a fan spinning behind the rear panel. Grease rides along in that airflow. It coats the fan blades and cakes into the housing tucked behind the back plate – the one region sealed off from the cavity, and therefore the one region the pyrolytic heat never scours. The cavity comes out spotless and the smell stays exactly where it was. The owner can’t work out why a “clean” oven still stinks as it warms up, when the source is bolted behind a panel the cycle cannot see. I’ve had customers run three back-to-back cycles chasing that smell, watching their electricity meter spin, none the wiser that the culprit was never inside the cavity to begin with.

The fan housing nobody thinks about

I unscrew that rear panel on most deep cleans, and the state of the fan behind it tells the true story of how an oven has been used. A flat I did off Abbeville Road in Clapham had a mirror-bright cavity from weekly pyro cycles and a fan housing lined with the best part of a year’s worth of Sunday roasts. The owner had run the self-clean religiously and never smelled anything but success. Behind the panel, it was a horror show.

So when does a self-cleaning oven still need a person?

More often than the sticker on the front suggests. The cavity is the easy 60% – the part every clever cycle handles well and the only part a customer ever looks at. The awkward 40% is where I make my living.

Door glass with grease sealed between the panes. Catalytic liners that gave up two years ago and can’t be scrubbed. Steam channels furred solid with limescale. A fan housing packed with airborne fat. Every one of those jobs wants a person with hands and proper tools. A heat setting won’t do a thing for any of them.

There’s also the base tray under the bottom element, which on plenty of ovens lifts out and never does, sat there catching the drips from every joint and lasagne since the appliance was installed. I pulled one out of a cooker in Walthamstow that still had the fat from someone’s last Christmas welded to it in July. A pyro cycle had run over the top of it a dozen times and left it entirely alone.

The runners and the perished door seal

Two last things the cycle ruins rather than cleans. Grease gathers under the shelf runners where no airflow reaches it, and it sets there like glue over a couple of years. Then the rubber door seal – the manual tells you to take it out before you run a pyrolytic cycle, because 500°C will perish the rubber, and I’d wager a fair sum that half the people reading this have never once removed it. A hardened, cracked seal lets heat escape and lets grease creep further into the door with every roast.

Ran a pyro cycle on a range in Highgate last week where the seal had been cooked so many times it crumbled between my fingers as I lifted it clear.

You Don’t Like Oven Cleaning? Here Are The Five Dishes To Stay Away From Cooking

Why Does Oven Cleaning Feel Like a Punishment?

I once spent a whole Saturday morning with my head in the oven. Not because I fancied a tragic end, but because a rogue lasagne had erupted like Vesuvius and glued itself to every surface inside. The smell of burnt béchamel had haunted me all week, and no amount of scrubbing made me feel clean again. I had a blister on my thumb, a blackened sponge, and a deep hatred for my past self.

If you’re anything like me — a Londoner with better things to do than chip melted cheddar off metal racks — then oven cleaning probably sits high on your “absolutely not” list. We’re busy. We’ve got narrow kitchens and questionable extractor fans. Who wants to be scraping carbonised goo when you could be down the pub?

So here’s a public service announcement: if you hate oven cleaning, there are certain dishes you’d best avoid. They might look delicious on Instagram, but behind the bubbly crust and caramelised glaze hides a fiery pit of sticky, smoky regret.

Let’s name and shame the worst offenders.


The Dishes That Hate Your Oven — And Your Sanity

1. Cheesy Lasagne That Bubbles Like Lava

Lasagne is the king of weeknight comfort. Layers of pasta, rich meat sauce, white sauce, and a golden top of mozzarella and cheddar. But the moment it gets too excited — and it always does — it boils over like an unattended kettle.

That bubbling cheese doesn’t just stop at the dish. It drips down the sides and hits the oven floor with a sizzle, where it instantly transforms into something that resembles black tar. You could let it cool and try scraping it, but be warned — it clings on like it’s got a mortgage there.

Even worse, the next time you use the oven, that charred cheese will smoke, hiss, and stink out your whole kitchen. You’ll swear you didn’t burn anything, and yet your flat will smell like a foot.

Pro tip? Don’t cook lasagne unless you’ve got a tray underneath and the energy to deal with the aftermath. Or just order one from that Italian place round the corner that doesn’t judge you.

2. Sticky Barbecue Ribs That Drip and Sizzle

You marinate the ribs overnight. You lovingly slather them in homemade sauce. You slide them into the oven with the kind of anticipation usually reserved for birthdays. But an hour later, your ribs are ready, your kitchen’s smoky — and your oven is wearing half the glaze like a badge of dishonour.

Barbecue sauce is sugar’s evil twin. The moment it starts heating up, it drips and hardens into a black crust that not even vinegar wants to deal with. It bubbles, it burns, and before long you’re dealing with fumes that smell like a bonfire made out of treacle.

This dish is criminal for the oven. Your only hope is using foil-lined trays with deep sides — and even then, you’ll probably miss a rogue splash. If you must have ribs, chuck them in a slow cooker or on a BBQ grill outside. Your oven will thank you.

3. Roast Chicken with All the Trimmings (and a Side of Grease Fire)

Ah, the classic roast. You imagine golden crispy skin, steaming roasties, and gravy that’d make your nan weep with pride. But here’s the bit nobody tells you — roasting a chicken is like unleashing a fat-spraying hose inside your oven.

As the bird cooks, fat melts and splashes. The juices escape the tray. The skin hisses and pops. One rogue leg slips over the edge and starts dripping straight onto the element below. The result? A greasy inferno that leaves your oven glistening with oily regret.

It’s not just the mess — it’s the smell that sticks around. Days later, your oven door still gives off a whiff of roast dinner. Might be nice once. Not so nice when you’re reheating leftover curry.

Try roasting bags if you’re desperate, or better yet, outsource Sunday roast to the pub. Let their kitchen staff deal with the carnage.

4. Fruit Pies That Boil Over Like a Science Experiment

A homemade fruit pie sounds like something out of a quaint village bake-off. You imagine flaky crusts, juicy berries, and the proud moment you present it at the table. What you don’t imagine is the red-hot tsunami of fruit filling that erupts and dribbles into every crevice of your oven.

Apple, cherry, raspberry — doesn’t matter. Once that sugary juice escapes, it bubbles like jam and sticks harder than superglue. You’ll be scraping it for hours, swearing under your breath and wondering why you didn’t just buy one from Tesco.

Even putting a tray underneath doesn’t guarantee safety. Some of it always finds a way past. And sugar burns faster than anything — your oven will smell like scorched syrup for a week.

Eat pie, yes. Bake pie? Maybe not.

5. Homemade Pizzas with More Toppings Than Sense

We all get ambitious. We buy dough. We pile on sauce, cheese, mushrooms, sausage, pepperoni, jalapeños, olives. It looks beautiful. Until the toppings slide off in the oven like an avalanche.

The cheese melts off the edge and bubbles underneath. The pepperoni curls up and flicks grease at the oven walls. Crusty bits get stuck to the rack, and tomato sauce welds itself into the surface like you were making stained glass.

The pizza ends up half in the oven, half on the door. You end up half delighted, half cleaning at midnight. Honestly, stick to frozen pizzas. They’re designed to behave.


Are These Dishes Worth It? Depends Who’s Cleaning Up

Don’t get me wrong — these meals taste brilliant. But are they worth the elbow grease and burnt knuckles? That’s another matter.

I remember once baking a cherry pie in the middle of a heatwave. It boiled over while I was fanning myself in the garden. By the time I got back, the oven looked like it had been involved in a fruit-related crime. I still haven’t quite forgiven myself.

If you’re cooking for a crowd and someone else is doing the cleaning, crack on. If not, maybe think twice before throwing ribs in the oven at 10pm after two glasses of wine.


Quick Tips To Avoid A Horror Show Inside Your Oven

Use Foil or Baking Trays (But Not Too Much Foil!)

Lining the oven base with foil or popping an extra tray underneath your dish can save you from drips. Just don’t block the vents — you’ll mess up the airflow and possibly overheat the oven. Some newer ovens even come with “do not foil” warnings.

I knew someone who lined every surface inside their oven with foil. Looked neat. Until it started sparking and shorted the whole thing out. Not ideal in a rented flat.

Bake Smarter, Not Messier

Air fryers, slow cookers, pressure cookers — these gadgets exist for a reason. You can get that crispy chicken or sticky rib flavour without your oven taking the brunt. London kitchens aren’t known for space, but a countertop gadget beats scrubbing baked-on beef fat at 11pm.

Clean As You Go (No One Does This, But Still)

If you happen to spot a fresh spill, sprinkling salt over it can help absorb grease and make it easier to wipe off later. Easier said than done — but if you’re brave enough to open the oven mid-bake, a quick wipe can save you a full clean later.

Otherwise, just accept that every so often, you’ll need to dig in. Put on some music. Wear gloves. Swear if you must.


Still Want to Cook These Dishes Anyway? Here’s How to Cheat the Clean-Up

Let’s be honest — you’re probably going to ignore everything above and make that cheese-dripping lasagne anyway. I would too. So here’s how to make life easier:

  • Oven liners: Teflon or silicone sheets that sit at the base and catch the mess. They’re reusable, wipe clean, and don’t burst into flames like foil might.
  • Silicone baking mats: Put them under your tray. Wash them in the sink after. No big drama.
  • Roasting bags: Pop your chicken or ribs inside. They trap the juices, and you just bin the bag after.
  • Soaking trays overnight: Bit of washing-up liquid, hot water, and a sprinkle of bicarb. Leave it till morning. Wake up to a miracle (or at least a soft goo you can scrape off).
  • Call a cleaner: Let someone else deal with the mess once a month. No shame in that.

Cooking at home is a joy — until your oven becomes a battlefield. So next time you’re about to make something bubbly, sticky, or fatty, ask yourself one question: Do I really want to clean this tomorrow?

If the answer’s no, maybe just make a sandwich. Or better yet — cook on the hob and keep that oven door firmly shut. Out of sight, out of scrubbing.

The Top Five DYI Oven Cleaning Hacks You Can Use At Home

Do you find yourself tired of managing a dirty and greasy oven? Maintaining a clean oven is crucial for upholding a hygienic kitchen and guaranteeing that your dishes are cooked evenly and taste scrumptious.

We will explore the advantages of routine oven cleaning and present the top five do-it-yourself cleaning techniques that you can apply in your home. We will also give you some helpful advice on oven maintenance and when it’s necessary to enlist professional assistance.

Bid farewell to a chaotic oven and welcome a gleaming, clean kitchen!

Natural Oven Cleaner Recipe

The Importance of Keeping Your Oven Clean

Ensuring the cleanliness of your oven is crucial not only for preserving the durability of your appliance but also for safeguarding the safety and hygiene of your living space. Regular cleaning is imperative to prevent the buildup of grease, grime, and food residue, which can present fire risks and impact the flavour and quality of your cooked meals.

Benefits of Regular Oven Cleaning

Regular oven cleaning has many benefits, including improved appliance performance, enhanced hygiene, and the prevention of grease and grime buildup that can pose safety hazards.

Maintaining a clean oven ensures that it operates efficiently, evenly distributing heat for optimal cooking results. A clean oven also reduces the risk of fires caused by accumulated grease, which can ignite at high temperatures. Keeping your oven clean promotes healthier meal preparation, as old food residue or burnt particles can taint the flavours of your dishes.

Regular cleaning not only enhances the lifespan of your oven but also contributes to a more pleasant cooking environment, free of unpleasant odours and potential health concerns.

Preventative Measures and Routine Cleaning

Top Five DIY Oven Cleaning Hacks

Explore the top five DIY oven cleaning tricks that are effective, efficient, eco-friendly, and cost-effective. These methods use common household ingredients to achieve immaculate results without the need for harmful chemicals.

Hack #1: Using Baking Soda and Vinegar

One of the most popular and environmentally friendly DIY cleaning tips involves using a natural solution of bicarbonate of soda and vinegar to effectively break down and remove grease and grime from your oven. To get started, you should mix a paste of bicarbonate of soda and water to apply to the inside of your oven, focusing on areas with tough buildup. Allow it to sit for a few hours or overnight to enable the bicarbonate of soda to absorb odours and loosen grime.

Next, spray vinegar over the bicarbonate of soda paste to create a foaming reaction that aids in lifting off stubborn stains. Use a scrubbing brush or sponge to gently scrub the mixture, enjoying the satisfaction of watching the grime dissolve. This method not only cleans effectively but is also non-toxic and safe for the environment, making it a popular choice for environmentally conscious individuals.

Hack #2: Lemon and Salt Scrub

Utilise a lemon and salt scrub as a natural and efficient method for cleaning your oven, taking advantage of the acidic properties of lemon to cut through grease and the abrasive nature of salt to eliminate grime.

To create a lemon and salt scrub, combine equal parts of lemon juice and coarse salt to form a paste. Apply this mixture to a sponge or scrubbing brush and use it to clean the oven surfaces. The citric acid in the lemon aids in breaking down tough stains and grease, while the salt serves as a mild abrasive to remove residue. Not only does this technique clean effectively, but it also minimises the need for harsh chemicals, making it a sustainable choice for environmentally conscious individuals.

Hack #3: Steam Cleaning Method

The steam cleaning method offers a natural and eco-friendly solution for loosening and removing stubborn grease and grime in your oven. This technique harnesses the power of heat and steam to effectively break down dirt and residue without the need for harsh chemicals.

First, a heat-resistant container is filled with water and heated to produce steam. The high temperature of the steam not only aids in sanitising and disinfecting surfaces but also ensures a thorough cleaning process by reaching into crevices and corners that traditional methods may overlook.

When using steam cleaning, it is crucial to observe certain safety measures. These include wearing protective gear and ensuring proper ventilation to prevent burns and exposure to steam. Steam cleaning’s environmental advantages stem from its ability to clean effectively without the use of harmful chemicals, thereby reducing the overall environmental impact while still achieving exceptional cleaning results.

Hack #4: Natural Oven Cleaner Recipe

When creating your natural oven cleaner, you can opt for a simple, non-toxic approach that utilises common household ingredients to maintain a clean oven while being eco-friendly and effective.

An effective recipe involves mixing 1/2 cup of bicarbonate of soda with water to create a paste. This paste can be spread inside the oven and left overnight to break down stubborn grease and grime effectively. The following day, you can easily wipe away the paste using a damp cloth.

Consider preparing a solution for tougher stains by combining equal parts water and white vinegar in a spray bottle. Spray this solution inside the oven and allow it to sit for 30 minutes before wiping it clean. This method offers effective cleaning and eliminates the need for harsh chemicals.

Hack #5: Using Dish Soap and Hot Water

A practical technique for cleaning your oven involves using washing-up liquid and hot water to dissolve grease and grime, making it easier to remove any residue.

  1. Begin the process by preparing a solution of hot water and a few drops of washing-up liquid in a bowl.
  2. Proceed by carefully removing the oven shelves and trays, soaking them in the soapy mixture for around 30 minutes.
  3. While the shelves are soaking, apply the soapy water solution to the oven’s interior, ensuring thorough coverage of areas with grease and grime buildup.
  4. Let the solution sit for a while, then use a scouring pad or brush to gently remove the dirt.
  5. Finally, rinse the interior, shelves, and trays with fresh water to reveal a sparkling-clean oven.

Tips for Maintaining a Clean Oven

To maintain a clean oven, you must regularly clean it and implement preventative measures to minimise grease buildup and spills. It is also essential to use the appropriate tools and protective equipment to ensure safety and optimise efficiency.

Preventative Measures and Routine Cleaning

Implementing preventative measures and routine cleaning can significantly reduce grease buildup and spills in your oven. This ensures easier maintenance and leads to better performance over time.

When cooking, it is advisable to use baking trays to contain spills and prevent them from directly affecting the oven surfaces. Additionally, promptly wiping down spills as soon as they occur can prevent grease from hardening and becoming more challenging to clean later on.

Regular inspection of the oven’s interior allows you to identify potential issues early, enabling timely maintenance. It is essential to utilise appropriate cleaning tools and protective gear, such as gloves and goggles, to ensure safety and efficiency during the cleaning process.

When to Seek Professional Help

Although DIY cleaning methods and routine maintenance are suitable for many scenarios, there are instances where professional assistance becomes essential to guarantee your oven’s safety and optimal performance, especially when faced with persistent stains, intricate components, or potential equipment malfunctions.

Signs that Your Oven Needs Professional Cleaning

Several indicators that your oven may require professional cleaning include persistent stains, unusual odours or fumes, and visible wear on oven components such as burners, grills, and the gasket seal.

If your oven is not heating evenly or making strange noises during operation, it could be a sign that it needs professional attention. If you experience uneven cooking results or find that your food is taking longer to cook than usual, this might indicate a need for professional cleaning.

It’s crucial to prioritise regular inspections and maintenance by professionals to ensure your oven operates efficiently and safely, preventing potential hazards and extending its lifespan.

How Often Should You Deep-clean Your Oven

I’ve been noticing a bit of a grease and grime situation in my oven lately. And let’s not even talk about those lingering odours that just won’t quit every time I try to cook something. These are red flags that my oven is overdue for a serious deep clean. So, let’s dive into why deep-cleaning your oven is crucial, the telltale signs that it’s high time for a scrub-down, various ways to tackle the cleaning job, and some handy tips for keeping that oven sparkling. If you’re all about keeping your oven in tip-top shape, stick around for some helpful advice!

Why Is Deep-cleaning Your Oven Important?

What Are the Signs That Your Oven Needs to be Deep-cleaned?

I always look for signs that my oven is starting to look worse for wear. If I see burnt food residuetough stains, or an overall decline in cleanliness, I know it’s time for a deep-clean session.

When my oven gets too grungy, it doesn’t just affect how my food tastes – those old spills and splatters can mess with the flavour of my dishes. A neglected oven isn’t just about bad meals; it can also be a breeding ground for health hazards with accumulated grease and grime. That’s why I make sure to clean my oven regularly. Not only does it help my oven last longer, but it keeps my kitchen a safe and hygienic place for me and my family to cook in.

Visible Buildup of Grease and Grime

When I see that thick layer of grease and grime building up inside my oven, I know it’s time to roll up my sleeves and give it a deep clean. It’s like a sign from the kitchen gods that I’ve been slacking in the cleanliness department.

That gunk isn’t just gross to look at; it can also mess with the taste of my meals and even be a health hazard if I let it stay. So, I whip up a little soda and water-paste bicarbonate to tackle those stubborn stains. I slap that paste on the trouble spots and let it work its magic for a few hours.

If the stains are extra stubborn, I might have to bring out the big guns—a commercial oven cleaner. I follow the instructions on the bottle to a tee because I’m all about safety first, especially regarding my cooking space.

And hey, here’s a little tip from me: cleaning up spills and splatters right after they happen can save you a significant headache later on. Trust me, a clean oven is a happy oven, which means delicious meals and a safer kitchen.

Strong Odours When Using the Oven

Whenever pongy smells start wafting out of my oven while baking, I know it’s time to roll up my sleeves and give it a deep cleaning. Not only does getting rid of those odours boost my food prep hygiene game, but it also stops any stubborn stains from setting in and helps my kitchen gear last longer.

I’ve learned that keeping up with maintenance tasks like wiping up spills ASAP and using oven-safe mats or liners is vital to keeping stains at bay and maintaining a spick-and-span cooking space. Plus, ensuring the inside of my oven and the racks are squeaky clean makes my baked treats taste better and lowers the chances of cross-contamination or food-related illnesses.

These little habits, which I’ve added to my cooking routine, make a big difference in keeping my kitchen safe and clean.

Uneven Cooking or Burning of Food

Uneven Cooking or Burning of Food

When your oven starts cooking things unevenly or burns your food, it’s like a sign screaming, “Clean me, please!” A deep clean can get rid of all that cooking gunk and ensure your oven works like a champ every time you bake. I’m all about staying on top of things with regular cleaning to protect my baking adventures and keep my kitchen game strong.

Making sure your oven is squeaky clean and free of any food bits or greasy mess is crucial for avoiding disasters and keeping your baked goods top-notch. Burnt food doesn’t just mess with the taste of your dishes; it can also release some funky fumes that’ll haunt your future meals. Taking charge and giving your oven a good scrub can make it last longer and cook better. That means no more surprises with half-baked or charred goodies. Trust me, a little effort in oven TLC now will save you from tons of cooking hassles later on.

How Often Should You Deep-clean Your Oven?

Finding the perfect frequency for deep-cleaning my oven is critical to keeping my kitchen in tip-top condition and making sure it’s a clean space to cook in. While regular cleaning assists with daily tidying up, establishing a schedule for deep cleaning based on how often I use my oven and what kind of cooking I do is essential for keeping everything neat.

I ensure I include regular deep-cleaning sessions in my household chores to address any tough stains and greasy buildup. By incorporating these sessions into my cleaning routine, I can prevent residue from accumulating and impacting my food’s flavour or the oven’s overall lifespan.

Following the correct steps for deep cleaning, such as using the appropriate cleaning products, scrubbing techniques, and ensuring good ventilation, helps me take the best care of my oven and maintains my kitchen as a healthy environment for cooking.

Factors That May Require More Frequent Deep-cleaning

Frequency Depends on Usage

I base how often I deep-clean my oven on how much I use it and how intense my cooking adventures get in the kitchen. Connecting the dots between how frequently I clean my oven, the overall tidiness of my kitchen, and my culinary cleaning habits is critical to keeping a clean and efficient cooking environment.

Having a well-kept oven doesn’t just make my dishes taste better – it also makes my appliance last longer. When I sync my oven cleaning routine with my other kitchen cleaning habits, it’s like creating a seamless game plan for kitchen cleanliness.

Regular cleaning stops grease from building up, lowers the chances of sneaky particles messing with my food, and ensures heat spreads evenly when I’m cooking. I need to check on my oven regularly to determine when it needs a deep clean based on how often and what I cook.

When I make oven maintenance part of my regular kitchen care routine, I boost the cleanliness and functionality of my cooking space.

General Guideline: Every 3-6 Months

Giving my oven an excellent deep clean every 3 to 6 months is the best way to keep it in top shape and prevent stubborn stains. This practice helps with culinary hygiene and ensures that my baking endeavours happen in a clean and safe kitchen environment.

When I stay on top of deep-cleaning my oven, I’m not just getting rid of food gunk and grease buildup but also warding off any funky smells or potential fire hazards. It’s all about integrating oven maintenance into my kitchen routine to keep my culinary creations free of unwanted flavours or contaminants.

By sticking to a regular cleaning schedule for my oven, I’m making meal prep more efficient and extending the lifespan of my appliance. It’s a win-win situation that saves me time and money in the long haul.

Factors That May Require More Frequent Deep-cleaning

Regarding keeping my oven in top shape, factors like heavy usagedifferent cooking techniques, or certain baking practices might mean I need to give it some extra TLC more often. So, I’m always looking for efficient cleaning methods and using the right products to keep my oven squeaky clean and my kitchen spick and span.

Using the oven regularly in the kitchen can leave behind all kinds of greasy messes, spills, and stubborn food bits that can mess with how well my oven works and how clean it stays. Things like cooking at high temperatures, roasting meats, or baking sugary treats can all add up to needing to clean my oven more often to avoid tough stains and lingering smells.

I’ve learned that taking a proactive approach to oven care and ensuring I have the right cleaning supplies on hand can help keep my kitchen looking and smelling great. So, I’m all about staying on top of that oven maintenance to ensure my culinary adventures happen in a clean, healthy, and inviting space.

Steam Cleaning

What Are the Different Methods for Deep-cleaning an Oven?

When it comes to deep cleaning my oven, I love exploring different methods to find the one that fits my cleaning style and tackles all that built-up grime. Whether using oven racks, scrubbing tough stains, or picking the perfect cleaning products, each method helps get rid of burnt-on food and dirt for a shiny inside and out.

Focusing on the oven’s interior means taking care of the racks separately for that extra cleanliness boost. I like soaking them in hot water and dish soap, then giving them a good scrub to make sure even the most stubborn gunk comes off. Choosing the right cleaning products is vital, too – I go for non-abrasive cleaners or natural solutions like bicarbonate of soda and vinegar to cut through grease without harming my oven’s surfaces.

Combining these techniques is like hitting the reset button on my oven, bringing it back to its sparkling, brand-new state.

Using Commercial Oven Cleaners

Using commercial oven cleaners can simplify the deep-cleaning process. As someone who loves baking and cooking, I always appreciate expert cleaning tips that make my kitchen sparkle and help eliminate any grime, keeping my culinary space hygienic and well-maintained.

These unique cleaning products are made to tackle tough grease stains, stubborn baked-on food residues, and pesky lingering odours, ensuring your oven looks spotless and works like a charm. Adding these effective cleaning agents to my routine saves time and energy while keeping my kitchen squeaky clean. Commercial oven cleaners are designed to be tough on dirt but safe to use, striking that perfect balance crucial for busy kitchens where cleanliness is a top priority.

Natural Cleaning Solutions

When deep-cleaning my oven, I like to use natural cleaning solutions. This keeps my kitchen eco-friendly and removes residue without harsh chemicals.

And hey, a tidy kitchen and dealing with stubborn oven stains with sustainable cleaning methods make my cooking space spotless and environmentally friendly.

These natural solutions remove residue and stains like a pro and keep my oven’s surfaces tip-top shape. By steering clear of harsh chemicals, I ensure I don’t mess up the coatings on my oven and create a safe cooking environment.

Eco-friendly cleaners also leave a pleasant, fresh scent behind, kicking those chemical odours to the curb that traditional cleaners can leave hanging around.

Going for natural cleaning methods isn’t just about cleanliness—it’s about sustainability and creating a healthier cooking vibe in my kitchen.

Steam Cleaning

When I use steam cleaning to give my oven a thorough scrub, it’s like giving it a spa day for appliances. Not only does it keep things squeaky clean, but it’s also the smart way to maintain a hygienic kitchen.

The magic of steam in oven cleaning is that it tackles all that stubborn grease and grime so I can wipe it away without sweat. Plus, the high-temperature steam cleans and sanitises, eliminating germs lurking around. And the best part? It’s eco-friendly! No harsh chemicals are needed; it’s just good old steam doing its thing to keep my oven in top shape.

I include steam cleaning in my regular kitchen cleanup routine. It’s a small step that goes a long way in extending the life of my oven and ensuring my cooking space stays fresh and healthy.

What Are Some Tips for Maintaining a Clean Oven?

Regarding keeping my oven spick and span, I’ve got a few tricks up my sleeve. I make sure to give it a good scrub regularly, paying particular attention to the oven door and interior surfaces. With these tips in my back pocket and a cleaning schedule, I’m all set to maintain top-notch cleanliness for all my cooking and baking adventures.

I know that consistency is vital when it comes to oven care. That’s why I’ve designated a specific day each week to tackle cleaning my oven. I like to keep things natural by using bicarbonate of soda and vinegar to banish grease and grime without harsh chemicals. Oh, and those oven racks and trays? They get some extra love, too, because spills and residue love to hang out there. Making oven cleaning a regular part of my routine makes my appliances look shiny and new and creates a healthier cooking space in my kitchen.

Wipe Down Spills and Splatters Immediately

I promptly wipe down any spills or splatters in my oven. It’s a proactive way to keep my oven ready for action and maintain a clean kitchen vibe.

Taking care of those spills immediately smoother my kitchen routines and keeps the cooking atmosphere pleasant. By tackling spills immediately, I stop them from turning into stubborn, hard-to-remove messes later on. This proactive approach saves me time and prevents any unsightly stains from ruining the look of my oven. I rely on quick and effective cleaning methods to ensure my oven stays in top-notch condition, all set for my next culinary masterpiece.

Use Oven Liners or Mats

Adding oven liners or mats to my cooking routine is a game-changer for keeping my oven clean and making cleanup a breeze. These handy solutions line up perfectly with the best cleaning practices and help me manage my household more efficiently by taking care of my cooking equipment and ensuring my kitchen stays spick and span.

When I use oven liners or mats, I can stop food spills and grease from directly contacting my oven surfaces, which means less sticky residue buildup. It’s a real time-saver since I don’t have to spend ages scrubbing and scraping, plus it keeps my cooking space nice and hygienic. These liners also shield the bottom of my oven from stains and spills, prolonging the life of my appliance and making it much easier to maintain that fresh, new oven look and functionality.

Regularly Clean the Oven Door and Knobs

I make it a point to keep my oven door and knobs clean regularly because it freshens up my kitchen and helps me stay organised.

This simple maintenance not only extends the life of my oven but also prevents grease, grime, and food residue from building up and affecting the taste of my dishes. By making this cleaning routine a part of my overall kitchen organisation, I create a clean and hygienic cooking environment while ensuring my appliances work their best.

To make sure I don’t forget, I set aside a specific day each week for this task or include it in my monthly deep cleaning routine. I prefer natural cleaners like baking soda and vinegar to keep everything sparkling without harsh chemicals.

Schedule Regular Deep-cleaning Sessions

I schedule regular deep-cleaning sessions for my oven because it proactively prevents stains and keeps my baking safe. Prioritising the protection of my oven and kitchen through consistent cleaning practices is critical to effective kitchen management and culinary safety. It’s all about creating a spotless and secure cooking environment for all my culinary adventures.

When I follow a deep-cleaning routine, I get rid of tough stains and grime that could affect the taste of my baked goods and ensure a more hygienic food prep area. This dedication to oven maintenance doesn’t just prolong the life of my appliances; it also boosts their efficiency, saving me time and money in the long haul.

Maintaining a clean and organised kitchen isn’t just about looks—it’s about setting the stage for successful cooking and promoting a healthy lifestyle for me and my loved ones. So, it’s all hands on deck to keep my kitchen in tip-top shape!

How To Remove Stubborn Soot And Grease From Your Oven

A sparkling clean oven is essential for both homeowners and restaurant managers. However, stubborn soot and grease grime can quickly turn the most important kitchen appliance into an eyesore. While professional oven cleaning services like ours exist in London, tackling these stubborn stains yourself can be a rewarding task. This guide explores efficient methods to combat even the most challenging burnt-on deposits, ensuring a hygienic and well-maintained oven.

Safety First: Essential Precautions

Before diving into the cleaning process, prioritise safety:

  1. Turn off the oven and disconnect it from the mains: This is the golden rule. Never attempt to clean a live appliance. Double-check that the oven is completely off and the plug is removed from the socket to prevent accidental electrical shock.
  2. Allow ample cooling: Wait for the oven to cool completely before commencing any cleaning tasks. Touching a hot surface can result in severe burns. Consider cooling for at least an hour, especially if used recently.
  3. Ventilation: Strong fumes are often associated with cleaning solutions. Open all windows in the kitchen and activate the extractor fan to create a well-ventilated environment. It helps disperse harsh chemical fumes and prevents inhalation.
  4. Protect your hands and eyes: Wear heavy-duty rubber gloves that extend past your wrists for optimal protection. Opt for gloves made from a material resistant to the cleaning solutions you’ll be using. Consider safety goggles, mainly when you work with caustic chemicals or spray applications, to shield your eyes from splashes and vapours.
  5. Respiratory protection: A respirator is highly recommended for heavily soiled ovens requiring powerful cleaning solutions. Look for a respirator approved for organic vapours (such as those found in many cleaning agents) to filter out harmful fumes effectively.
  6. Beware of flammable materials: Keep flammable objects like cleaning cloths, paper towels, or oven mitts away from the hot oven and heating elements. Remember, even seemingly cool surfaces can retain heat and pose a fire risk.
  7. Store cleaning solutions safely: Always store cleaning products, especially harsh chemicals, in original containers with labels intact. Keep them out of reach of children and pets. Never transfer cleaning solutions to unmarked containers, as accidental ingestion can be dangerous.
  8. Dispose of cleaning products responsibly: Don’t pour leftover cleaning solutions down the drain or dispose of them in regular waste bins. Follow the manufacturer’s instructions for proper disposal to minimise environmental impact.

Assessing the Level of Soot and Grease Buildup

The cleaning approach hinges on the severity of the grime. Here’s a breakdown:

  • Light Grease: Characterised by a thin film easily visible on the oven surfaces.
  • Moderate Grease: Presents as a thicker layer, possibly with some discolouration.
  • Stubborn Buildup: Features burnt-on stains and a heavy layer of grease and soot, potentially requiring a multi-step approach.

Remember: Addressing light grease buildup regularly prevents progression to more severe cleaning issues.

Natural Cleaning Solutions for Light to Moderate Grease

For everyday cleaning or tackling light to moderate grease buildup, consider natural solutions:

  • Baking Soda Paste is a versatile option. Mix baking soda with water to form a thick paste. Apply liberally to the affected areas and leave for 12-24 hours. The alkaline properties help loosen grease. Scrub with a non-abrasive sponge and rinse thoroughly.
  • Vinegar and Water: A classic combination. Fill a spray bottle with equal parts white vinegar and water. Spray the solution onto greasy areas and allow it to sit for 15 minutes. The acidic nature helps cut through grime. Wipe clean with a damp cloth.

Tip: For stubborn patches, combine these methods. Apply the baking soda paste, then spray the vinegar solution to create a fizzing reaction that helps lift away the grease.

Commercial Cleaning Solutions for Heavy-Duty Oven Cleaning

For heavily soiled ovens, commercial cleaning solutions specifically for tackling stubborn grease and soot are necessary.

Important Note: Always refer to the manufacturer’s instructions for proper dilution and application methods.

Common options include:

  • Oven Degreasers: These powerful formulations break down grease and carbon deposits. Apply the solution following the recommended dwell time (typically 30-60 minutes), then scrub with a heavy-duty scouring pad and rinse thoroughly. Caution: Oven degreasers can be highly caustic, so strictly adhere to safety precautions.
  • Foam Oven Cleaners: Expanding foam clings to surfaces, effectively reaching nooks and crannies. Spray the foam liberally, allowing it to work for the designated time, then wipe clean.

Remember: When using commercial solutions, strictly avoid contact with the oven’s heating elements and electrical components.

Professional Oven Cleaning: When DIY Methods Fall Short

Professional cleaning services offer a time-saving and effective solution for heavily soiled ovens, particularly in restaurant settings where grease buildup is frequent and extensive.

Professional cleaners utilise specialised equipment and techniques:

  • High-powered chemical solutions: These industrial-grade formulations tackle even the most challenging deposits.
  • Dip tank cleaning: Oven racks and heavily soiled components are submerged in a heated chemical bath, ensuring a thorough clean.
  • Steam cleaning: High-pressure steam effectively loosens and removes baked-on grease and carbon deposits.

Benefits of professional cleaning:

  • Thorough cleaning: Ensures the removal of all grease, soot, and debris, promoting hygiene and oven efficiency.
  • Reduced fire risk: Eliminates potential fire hazards associated with excessive grease buildup.
  • Extended oven lifespan: Regular professional cleaning helps maintain the oven in optimal condition, extending its lifespan.

Additional Tips for Maintaining a Clean Oven

Regular cleaning: Wipe down spills immediately to prevent grease buildup.

Deep clean: Perform a deep clean every 3-6 months, depending on usage frequency.

Self-cleaning ovens: If your oven has a self-cleaning function, use it. However, this process can reach high temperatures and may not be suitable for heavily soiled ovens.

Aluminium foil: Line the bottom of the oven with aluminium foil (replace it regularly) to catch spills and splatters and simplify cleaning.